How to set up Google Tag Manager
Keep all Google and 3rd party tags together in one place
Google Tag Manager has been around for some years now but much to my own surprise, it is still underused nowadays, even among professional online marketing agencies. That’s a pitty because it offers a lot of possibilities to centralize work that is usually scattered over different people or applications. It seems daunting at first but once you get your bearings you will appreciate its flexibility.
In this tutorial we will walk through a basic set-up so you can see what to expect and how to make some basic settings. Naturally, you’ve got to have a gmail-address. So in case you haven’t got one, create one for free in an instant.
Some things to know about Google Tag manager
Many people think that Google Tag Manager is the successor of Google Analytics. It isn’t. Google Tag Manager is not a module to collect website data and you will still use Google Analytics to define conversions and to draw reports of website data. Google Tag Manager is a versatile tool that allows you to centralize tags (Google tags and third party tags) into one user interface, eliminating the necessity to put them all separately in your website code. This can make your life as a webmaster or account manager a whole lot easier. You can see all your tags in one place. You can alter them or add new tags in a blink of an eye. Most importantly: you don’t have to walk to a developer every time you want to change tags in the website code.
Starting with the set-up
So, you got your gmail-address, this also gives you immediate access to Google Analytics and to Google Tag Manager. We will use both in this tutorial. If you don’t have a Google Analytics account linked to your website, you can set up some sort of demo account.
So log in to Google Tag Manager to start a fresh set-up.
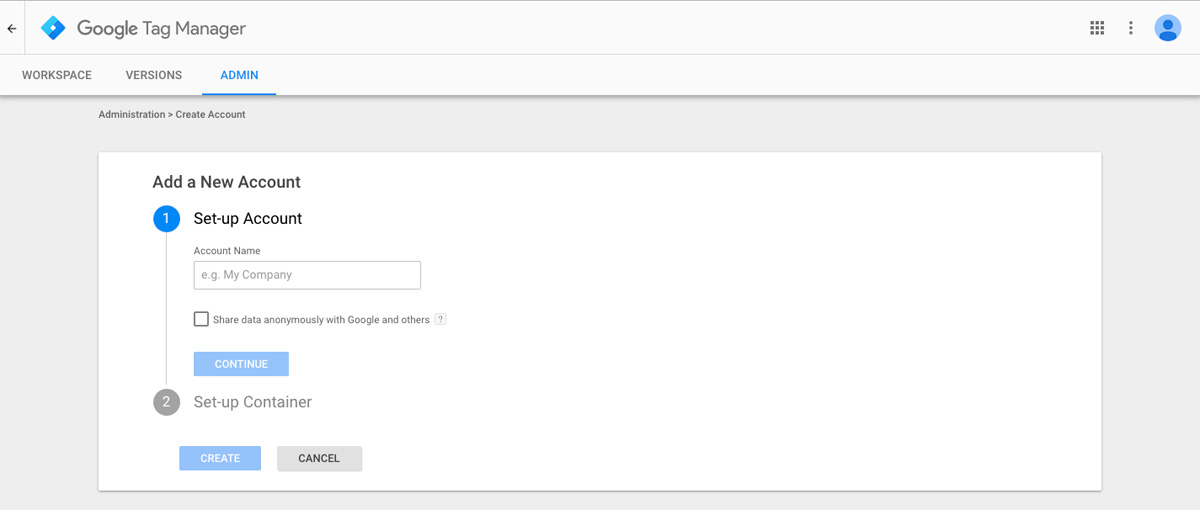
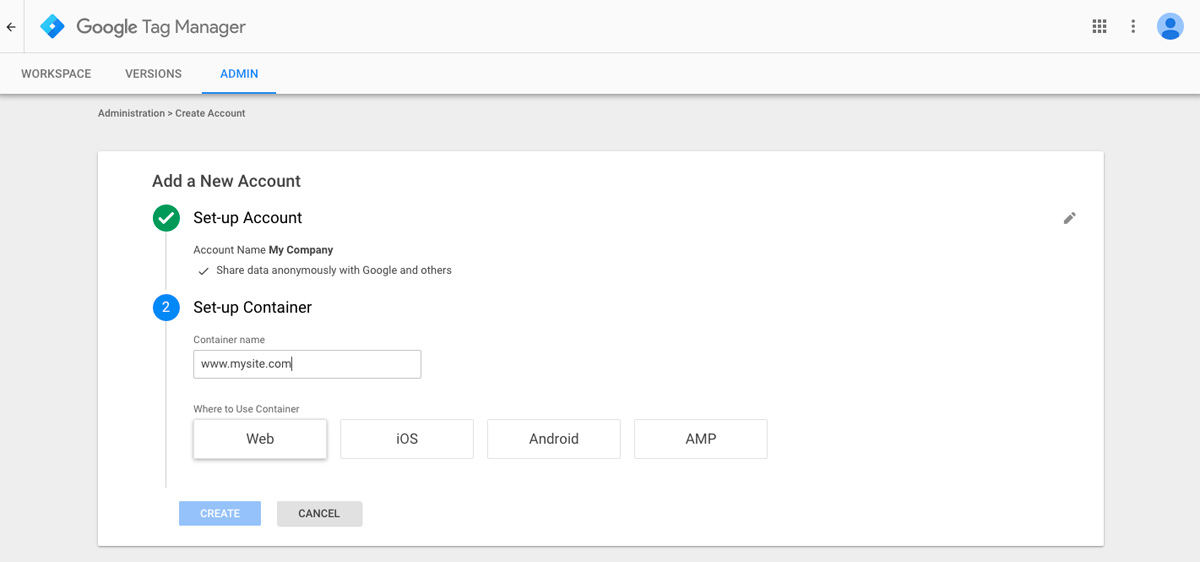
This speaks for itself: you start by setting up an account and you can opt to share data with Google. Next you create a container. Give this a logical name. You will now see the versatility of Google Tag Manager: you can opt for a website, iOS, Android or AMP. For this tutorial we will select ‘Web’ but it’s good to know you can measure everything: from websites to apps. Google Tag Manager is also fully compatible with Google Firebase, so if you manage apps for a customer, you even have more reason to dive into GTM.
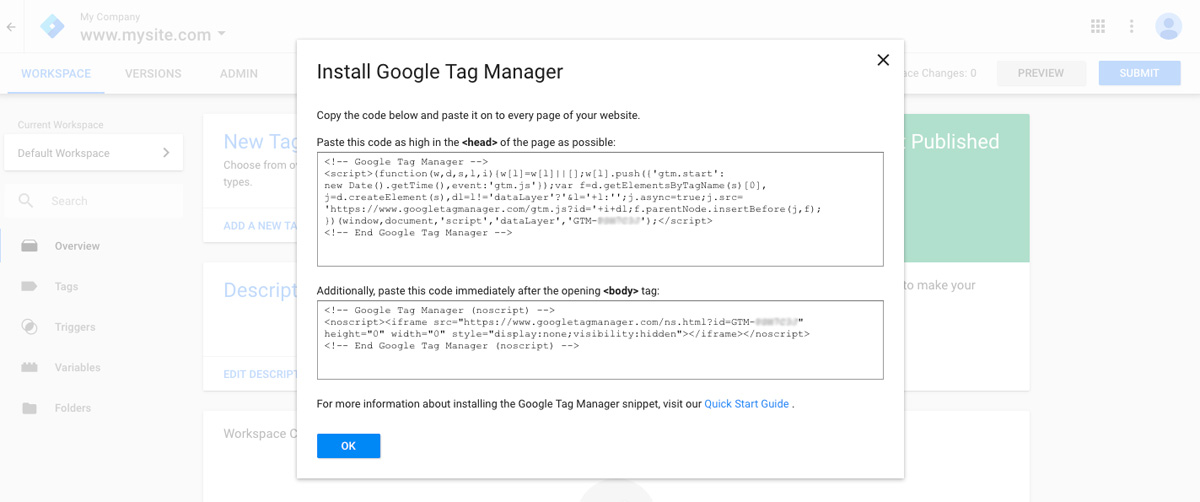
Next, you will have to agree to the Google Tag Manager Terms of Service Agreement and once you have done so, the codesnippet will pop up.
Note this code consists of two parts, contrary to the well-known Google Analytics trackingcode. The upper part has to be put in the header, the lower part after the opening body-tag. If you already had a Google Analytics trackingcode on your website: remove it! You will link Google Analytics to Google Tag Manger and all data will be tracked through the GTM-snippet. Note the GTM-prefix to the code’s ID, contrary to Google Analytics’ UA-prefix. Congratulations: this will be the last time you will have to make hard-coded changes to your website or count on the willingness of a web developer. All the rest can be done through the Google Tag Manager interface from now on.
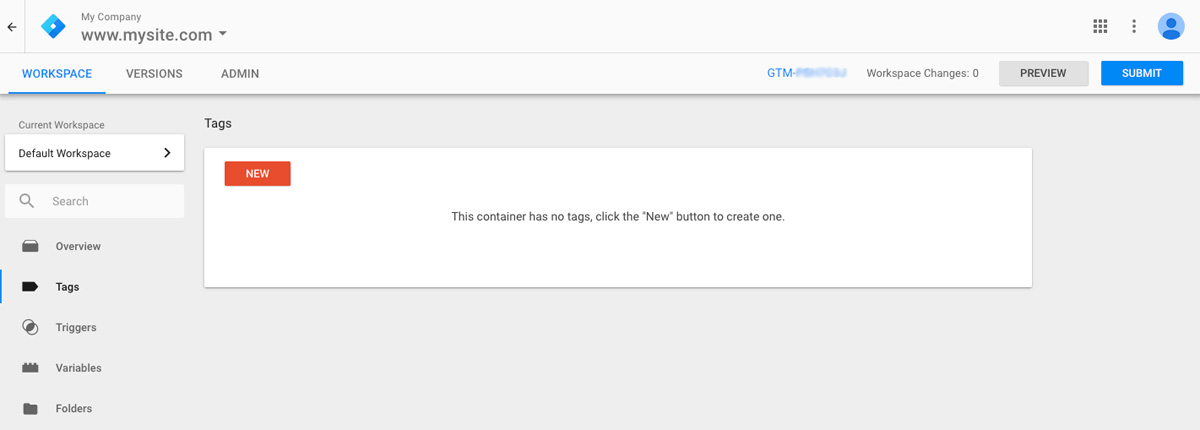
This brings you in the default workspace screen.
Getting your bearings in the interface
Google Tag Manager is organized in containers, offering the possibility to organize your account neatly. You made a ‘web’ container while setting up your account. If you are an experienced Google Analytics user, this structure will be familiar to you. Where you use a separate property (each with a unique UA-code) in Google Analytics to track different entities, you do the exact same thing here using containers instead. Each container comes with its own unique GTM-code. Where you have a hierarchy ‘Account > Property > View’ in Analytics, GTM uses ‘Account > Container’.
In Google Tag Manager there are three main levers to set up your container: Tags, Triggers and Variables. At first it can be confusing how these three interact with each other but after a while you will grasp the logic. Let’s walk through a basic configuration by linking a Google Analytics property to your new Google Tag Manager container.
Linking Google Analytics to Google Tag Manager
As mentioned, you don’t need both UA-code and GTM-code on your website. If you happen to use Google AdWords codesnippets, you can remove them too. Neither you have to put 3rd-party code from the likes of Hotjar, Crazy Egg in your website’s code anymore. The GTM interface allows you to configure them all from now on.
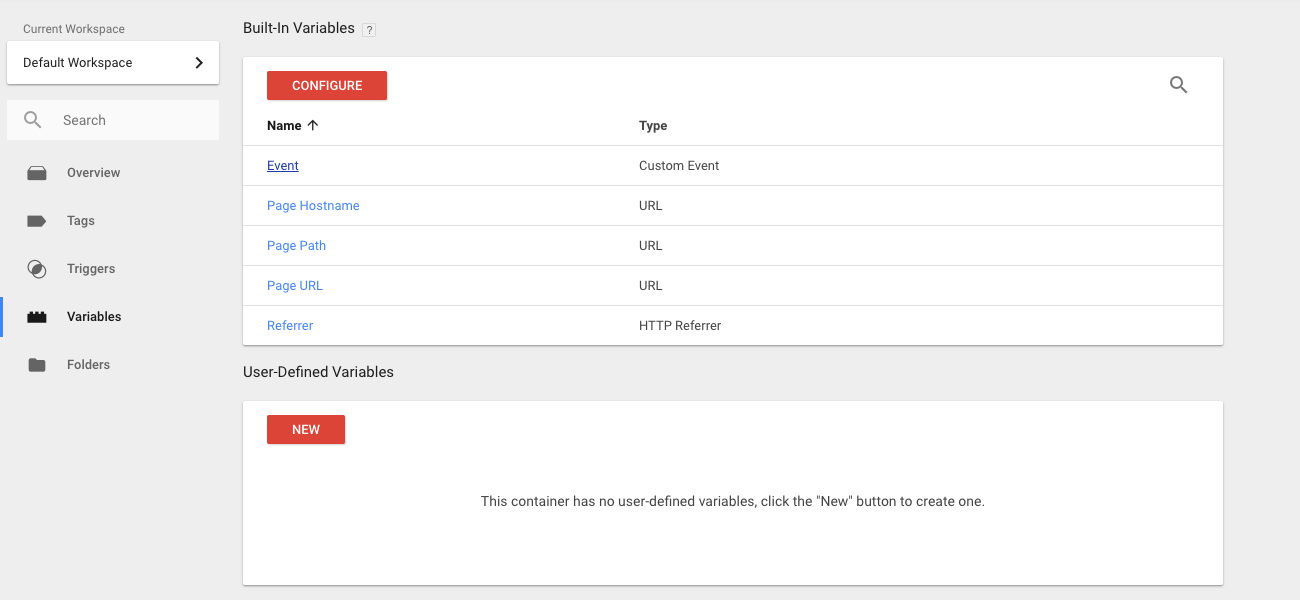
Click on the ‘Variables’ tab in the left colum. You will notice a number of Built-in Variables is already there. You won’t have to make any changes to those. Instead, we will define a variable of our own, so click the ‘NEW’-button.
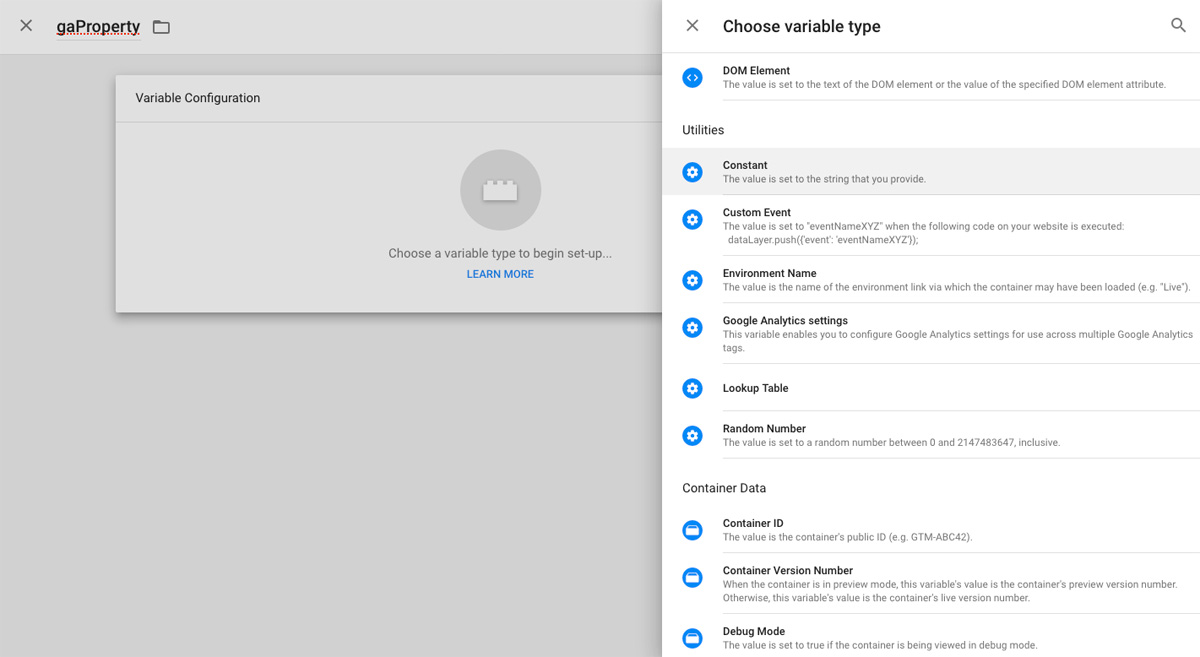
A new subscreen will slide out ‘Untitled Variable’. Change this into ‘gaProperty’. Then, hover the white rectangle titled ‘Variable Configuration’ and click the pencil that appears in the top right corner. Again, a scubscreen will slide out with an overview of variable types. Scroll down to the section ‘Utilities’ and select ‘Constant’.
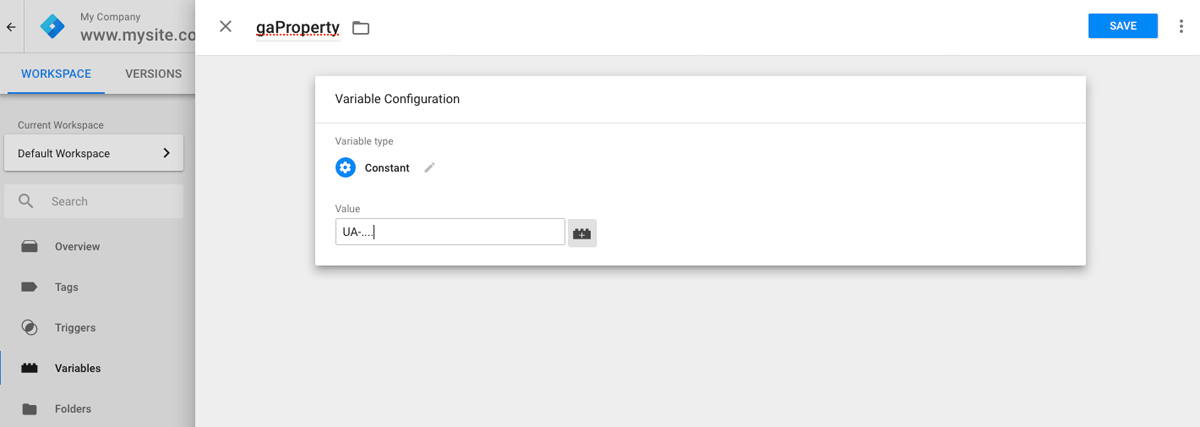
A new screen appears where u can write your Google Analytics UA code. Save when done.
Next we will insert this variable into a tag. Click on the ‘Tags’ icon in the left column and a subscreen will slide out. In the top left corner, you can replace ‘Untitled Tag’ with a name of your own. Naturally, it is recommended to use descriptive names. Call it ‘GA-pageview’. Next, hover over the white rectangle titled ‘Tag Configuration’. A pencil will appear in the top right corner. Click it.
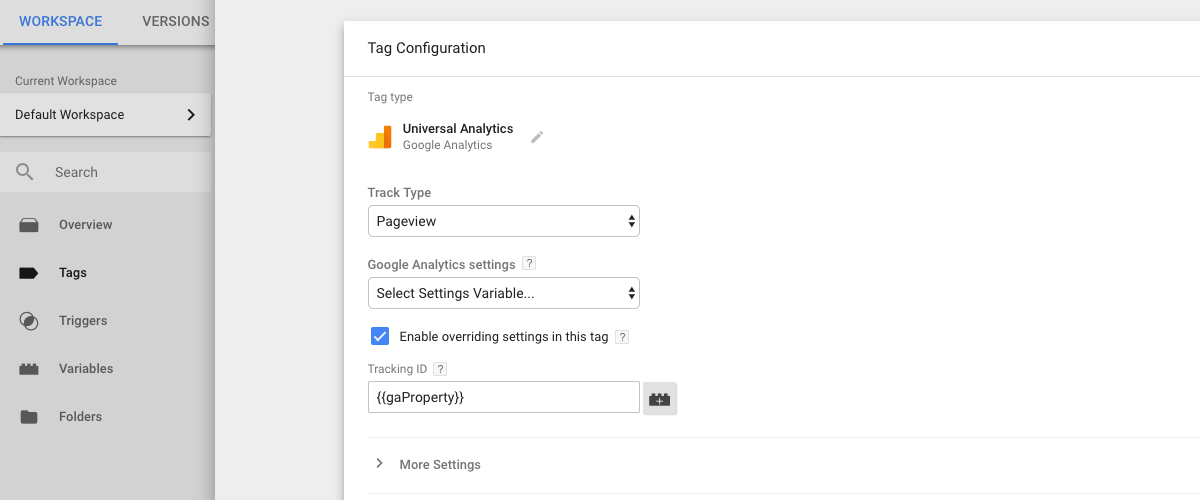
A new subscreen will slide out, giving you an overview of the vast number of tag types GTM has to offer. Some will definitely be familiar to you, others are more exotic. In this case, we can select the tag on top of the list: Universal Analytics. Note it still offers a tag for the Classic Google Analytics, if you happen to still use this version.
Leave the Track Type and Google Analytics settings as is. Tick the box ‘Enable overriding settings in this tag and write {{gaProperty}} in the Tracking ID. Save when done.
You will now be asked to add a trigger because otherwise the tag will not fire. A new screen pops up with one trigger to choose: All Pages. Tick the box and click the ‘ADD’ button in the top right corner.
You have now walked through all three elements in Google Tag Manager to make you better understand the correlation between them. Now all there is left to do, is to update your website. We have already placed the GTM code on our website so here comes the magic into play. There is no need to make hard coded changes or to upload files through an FTP agent. You are in full control from the interface. All you have to do is click the SUBMIT button in the trop right corner and you’re done.
To verify everything is working fine, you can run a check on your website with Google Tag Assistant. This is a browser extension allowing you to see all trackingcodes and triggers are doing what they are supposed to do.
Stay tuned for upcoming tutorials where we will dive deeper into Google Tag Manager, implementing event tracking.