Html beginner’s tutorial – part 2
Building the structure of your webpage with html-tags
This is part 2 of our html beginner’s tutorial. In this post we will continue to build on the index.html-file you made in part 1. If you missed out on that one, don’t hesitate to read it.
We will add plain text to the file and introduce some html5-tags to mark up the page. In future courses, a more advanced lay-out will be added. We are going to make a simple website about wines. It will help you to understand the basic principles of html, cascading style sheets (css) and in a later stage even JavaScript.
Feel free to download the completed file of this course. Naturally, we encourage you to follow the steps so you can pick up the essence of programming and learn gradually.
Add a html language reference to the head
Remember every html-document consists of two major parts: a head-section, which contains all the metadata of the document and a body-section, where the actual content is placed. Open the index.html-file from the previous episode and add the following code directly under the opening html-tag.
<html lang="en">The HTML lang attribute declares the language of the page. This is useful for search engines and browsers. We use “en” since we’re writing in English but obviously, you can use whatever language. Each language has an abreviaton, determined by ISO 639-1 language codes.
While we’re busy in the header, let’s change the generic title into something more useful for the rest of the course.
<title>World of wines<⁄title>Div-tags and specific html-5 tags
Now we come to the part of the document where we will put the actual content. Html-pages are structured by div-tags, which bring structure in the document and define certain regions with specific content. You are only limited by your own imagination how to make up a webpage. Back in the old days, html documents were structured by tables. Although tables are still used nowadays, their use is limited (or should be limited) to display tabular data. So if you ever stumble upon a website that still uses tables to structure the markup, you can be sure it dates of at least 10 years ago.
Html5 introduced a whole range of new tags that make your document more semantically understandable for search engines. We will explain some of them which we will use in this course:
The <nav> element
The <nav> element defines a region on the page destined for the primary navigation. You are allowed to use the element more than once on the same page but keep in mind that it is destined to contain hyperlinks on the page that are really used for the navigation, like the main menu.
The <article> element
This element is meant to define the part in the document that contains the unique content of your page. A perfect example is a blog article. It is a meaningful boundary of the main content, of what your page is about.
The <header> element
First of all: do not mix this up with <head>, which is a part of your html-document not visible for users and contains metadata. The <header> element contains a group of elements for introduction or navigation. Typically, the main title of the page is placed here, between <h1> <⁄h1> -tags.
The <aside> element
If you have parts on your page that are of secondary importance, the <aside> element is the most appropriate to use. Typically, quotes, videos, related messages or blocks with hyperlinks are placed here. The name of the element suspects it can only be used as a sidebar but is has little to do with the position or the visual represenation. You are free to put it at the bottom of your page as well.
The <section> element
This element describes a section of the document, more specifically a group of elements that are related to each other.
The <footer> element
This is obvious. This tag is used to define the footer of a page.In this tutorial, you will use more elements. However, these are tags that have been around since the very beginning of the web:
The <h1> element
This element is used for the main title of each page. From an SEO point of view, the importance of this element cannot be underestimated. Search engines consider this tag of great importance, since it says what the page is actually about. Other tags often used for subtitels are <h2,>, <h3> and all the way down to <h6>. These tags allow you to build a comprehensible hierarchy into your document, both for search engines and humans. In html-5, you are allowed to use the h1-tag more than once but it is not recommended to do so.
The <p> element
The <p> element is used for plain text or paragraphs
The <a> element
This is used to insert hyperlinks into you webpage
The <ul> element
Ul stands for unordened list. You can use this anywhere into you document. It is also commonly used to structurize navigations.
Setting up the structure of the html
Now that we’ve summed up the bricks we are going to use to build the html structure, let’s put this into practice:
Right after the opening <body> tag, add this to your file:
<div id="container"></div>
Enter a few line breaks since we’re going to put a lot more between these tags.
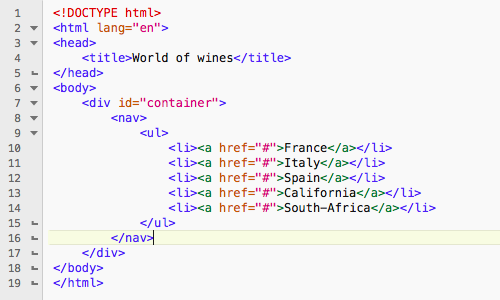
Next we will ad the structure of what will become our main navigation. So we use the <nav></nav> element in which we place an unordened list by means of the <ul></ul> element. This is further elaborated with <li></li> tags that stand for list item. In these list items, we place elements of what will become the clickable buttons in the navigation who are wrapped inside <a></a> tags since they will have to lead to another page in the site. Note that we haven’t written urls in the <a>-tags yet, since we are working on a single page for the time being. Instead, the #-tag enables the link functionality but will keep us on the page when clicked.
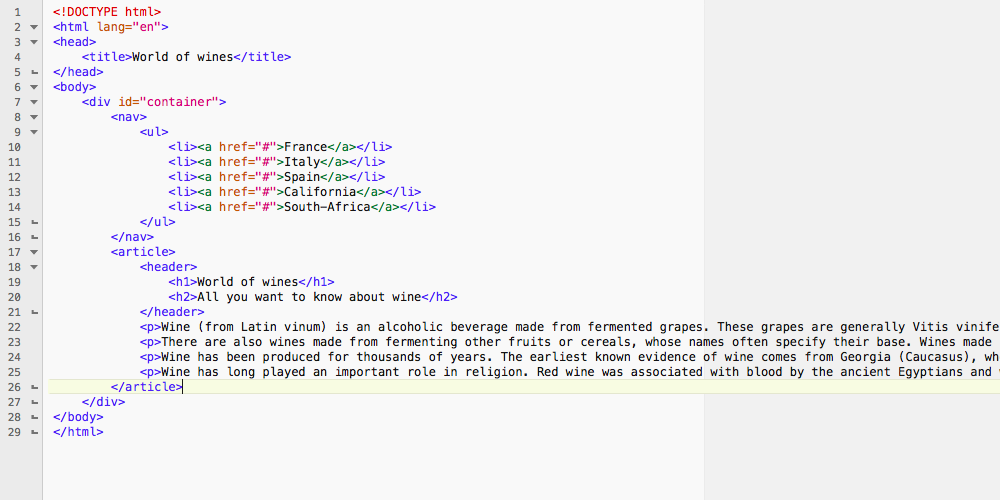
Next we insert the main part of the page. Here we use the <article></article>, <header></header>, <h1></h1>, <h2></h2> and <p></p> tags. If you’re wondering where I got the text, I picked it form Wikipedia, but you’re free to write any text you like.
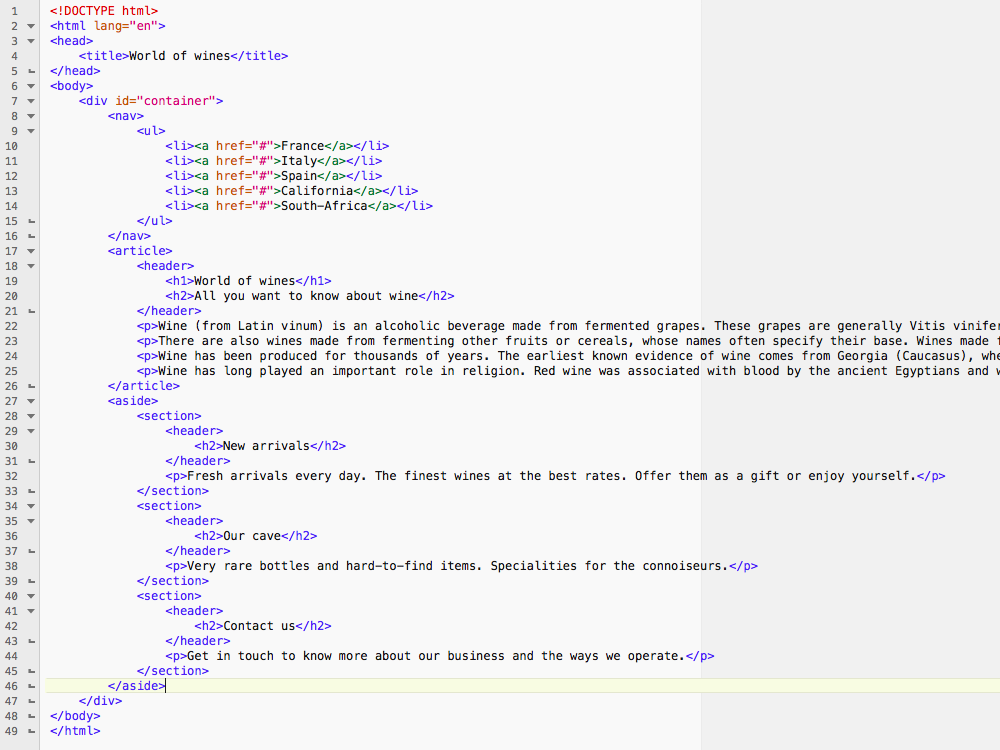
We will enhance the webpage with a sidebar, so you guessed it: it’s time to add the <aside></aside> element. Note that we add three <section></section> elements and that each section-element has a <header></header>, <h2></h2> and <p></p> element nested in it.
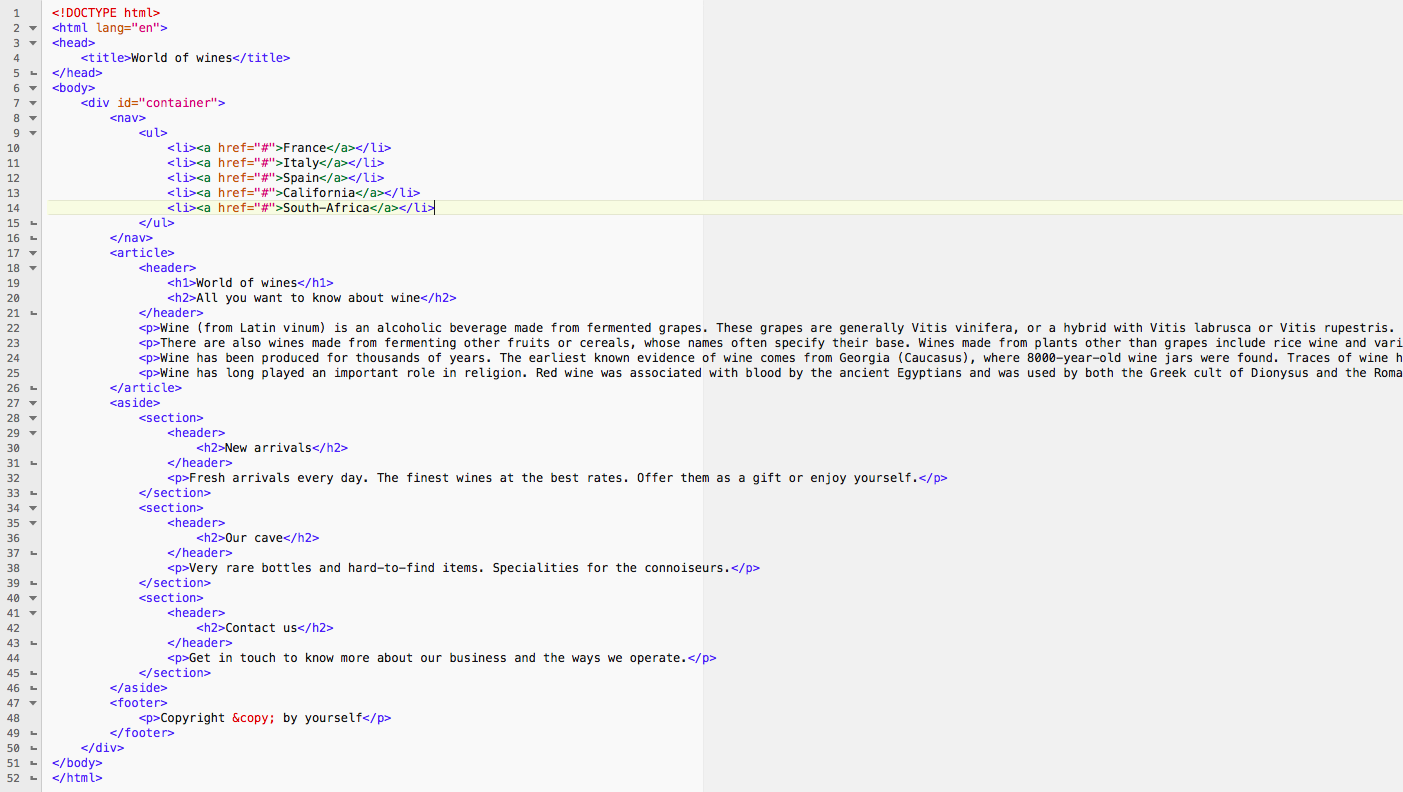
Finally, it’s time to add the <footer></footer> element. Pay attention to the special html-character. You will encounter these many times when writing html-code. In this case, it outputs the copyright-symbol. The entire code should now look like this:
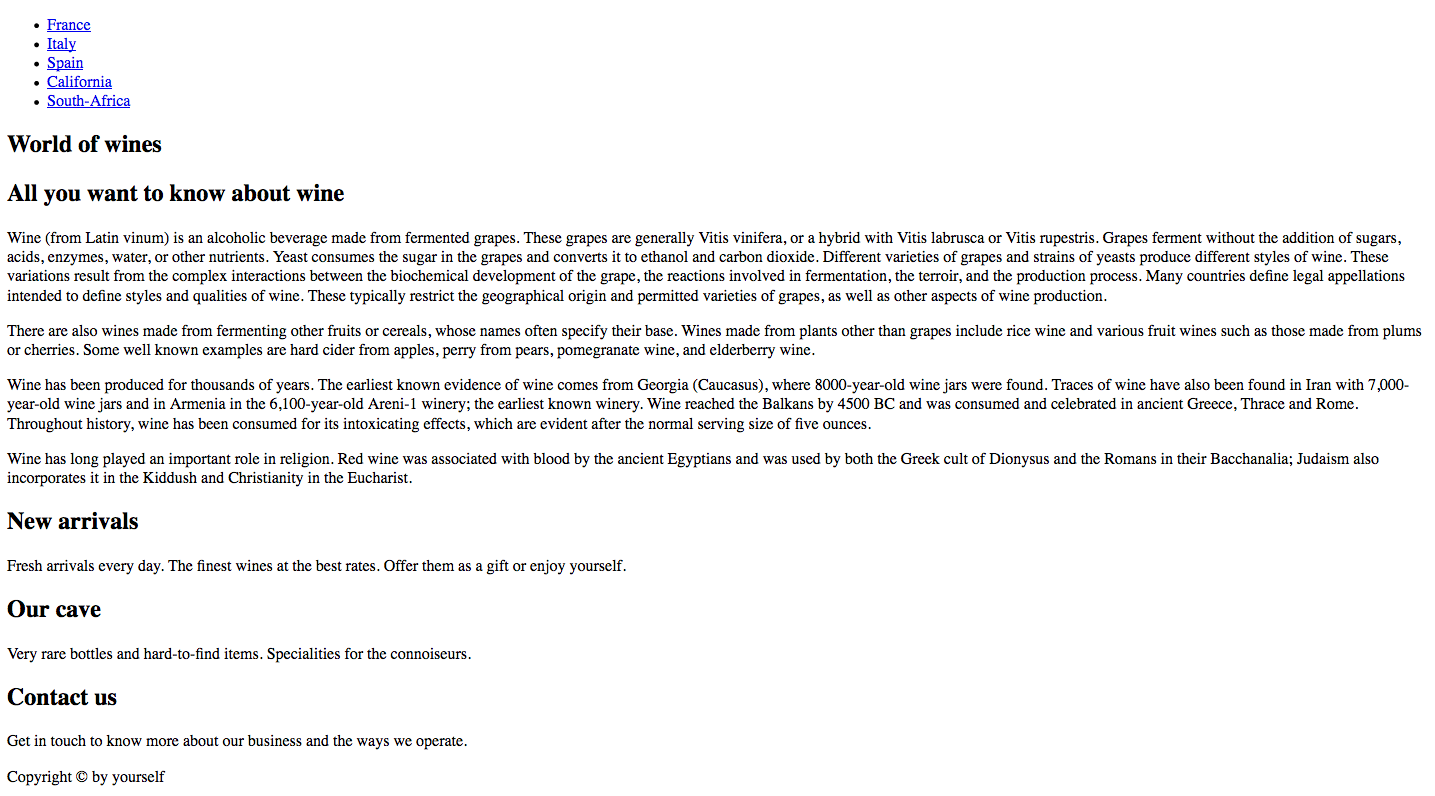
Save the document (if you haven’t already done so) and open it with your favourite browser. The output looks like this:
Doesn’t really look like an everyday website, right? Don’t worry, you have just written the plain html-code, no markup has been added yet. However, you can already recognize distinct parts: the navigation above is coloured blue and underlined, which makes clear these are hyperlinks. When you hover over these links, the mouse arrow will change to a pointer. Also note the dots before the links. These are added by default in html in an unordened list. The titles are clearly different from the rest of the plain text. The footer bears the © symbol.
We will build further on this structure in upcoming tutorials where we will introduce css to mark up the page.
So stay tuned for the next episode in this series.