Html beginner’s tutorial
Your very first webpage: getting to hello world
Ever wondered how the webpages you visit every day are actually constructed? In this html beginner’s tutorial, you will learn the very basics of html encoding to make your first webpage.
Html stands for Hyper Text Transfer Protocal and it is the markup language webpages are made of. Over the last few years and decades, several versions have been released. The actual version is html5. It combines the functionalities of both html and xhtml and boasts enhanced markup possibilities, especially for search engines.
If you want to know more about the versions and history of html since the beginning of the internet, read all you need to know on the WR3C website.
A basic knowledge of html is an absolute must if you are working in a digital environment, being a developer, online marketeer or sales person in a digital agency. Even if you are not technically skilled, understanding the markup of webpages can help you to point out customer’s needs. With the importance of findability in search engines on the rise, comprehending the structure of websites has become an absolute must.
Setting up your development environment
Before you even begin to write any code, it’s important to set up your development environment. To write html markup, developers use html editors. This sounds obvious but it is worth mentioning some common mistakes here:
Word processors like Microsoft Word or Google Docs are no html editors. Don’t use them. There are a lot of html editors out there, ranging from basic free software up to full-blown suites. Some of the most famous are:
| Adobe Dreamweaver | Mac, Windows | licence required |
| TextWrangler | Mac | free |
| TextMate | Mac | free |
| Notepad++ | Windows | free |
| Sublime Text 2 | Mac, Windows | licence required |
| Atom | Mac, Windows | free |
| PHP Storm | Mac, Windows | licence required |
So open your html editor and create a new file.
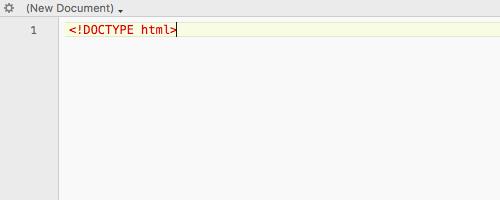
In your new file: type the following: <!DOCTYPE html>
This is the so-called html-declaration, more specifically the html-5 declaration. It is required for every html-document so the browswer knows what kind of document will be displayed.
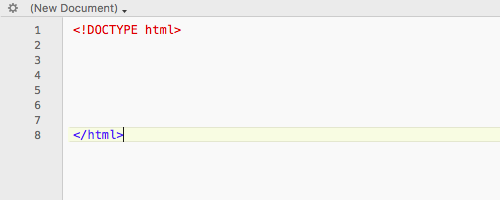
Now hit the enter-button a couple of time to create some whitespace and add the closing </html>-tag:
You wil notice along the course that html is constructed out of tags. You could call these the bricks that build the markup. Every tag that is opened, has to be closed too.
The head and body of an html-document
Every webpage or html-document consists of two major parts: the head and the body.
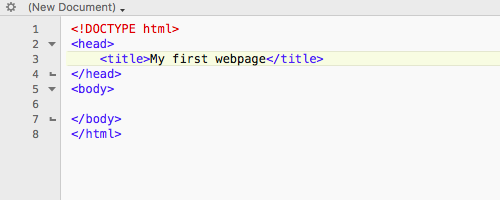
The head contains all the metadata like pagetitle, favicon, links to external css and JavaScript files and so on. The body makes up the actual content of your webpage, the stuff you will see on your screen. So go back to your document and add the head and body tags.
The next step is to give our webdocument a title, so add the <title></title> tag between the <head></head>-tags.
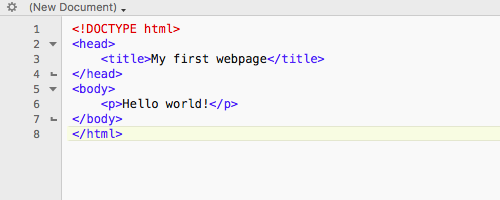
So far for the head of the document. We will now also write a simple line that will be displayed in the browser. Add a line of text (Hello world! in the example) between the <body></body> tags and put the line of text between an opening<p>-tag and a closing </p>-tag. Don not be troubled yet what these html-tags stand for, we will comme back to this at a later point during the course.
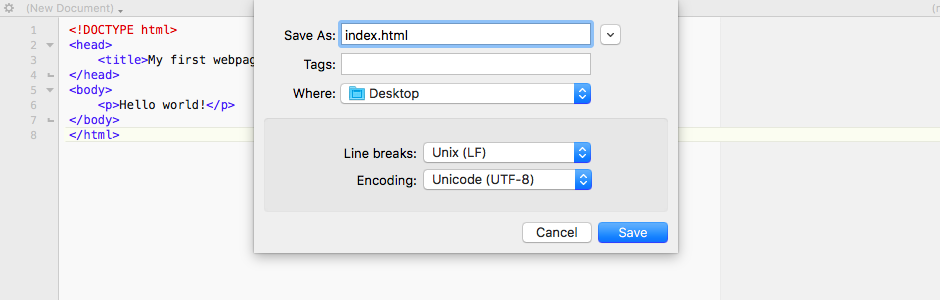
That’s it! Now save the document to your desktop and make sure you save it in the right document-format, being a .html file. Name it index.html. The name itself is of little importance but it’s a good thing you use common practice right from the start. If you see other options like encoding, ignore it for now. Default values should work fine.
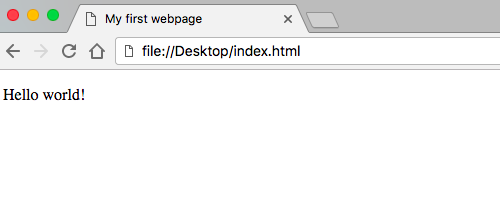
Now open the file with your favourite browser. To see the result.
You can now see that the title tag is displayed above your browserwindow. This was the line of text between the <title></title>-tags. Also, the line of code you wrote in the <body></body> of the document is shown on your screen.
Maybe you want to frame this one? Many congratulations on writing your very first webpage! How dull this may seem: you’ve just put your first step in an exciting world, with almost limitless possibilities. Stay tuned for our upcoming tutorials in which we will gradually enhance this basis to a fully functioning website.