Upgrade to expanded text ads in bulk
Change Standard Text Ads into Expanded Text Ads with Google AdWords scripts
Some time ago, Google introduced a new text ad format: the Expanded Text Ads. This format allows you to stack more useful information into a text ad that can catch the attention of people searching on the web and the SERPs. The new format provides two headline fields instead of one, a single but longer description line and two optional path fields where you can mention your most important keywords again. The new ad format is also designed to work smoothless on both desktop and mobile, thus eliminating the device preference setting.
At the moment of writing, both ad formats are still available. However, Google postponed the deadline for the creation of standard text ads to January 31 2017. Although you can still edit the old ad format, it is clear you have to swith to the new expanded text ad format as sooner rather than later, if you haven’t done so already. The extra features they offer make it a kind of no-brainer.
How to change existing standard text ads into expanded text ads
If you are an AdWords campaign manager with a respectable number of accounts in your portfolio, the number of adverts piles up quickly. I can imagine you have hundreds or even thousands of Standard Text Ads in existing campaigns that have been running for quite some time. Obviously you want to stand out and show to your customers you are up-to-date with all the latest evolutions but upgrading all existing Standard Text Ads can be a daunting challenge. At first, it seems time consuming and with impatient customers or supervisors breathing down your neck, finding a timeslot in your agenda can be a problem. It seems Google realized this too, so they have released a Google AdWords script that facilitates the transormation a great deal.
I myself am a big fan of Google AdWords scripts. They offer a whole new dimension to manage your accounts, whether it is for reporting, automation or maintenance. If have never used AdWords scripts before, this is the perfect opportunity to dive into it.
Truth be told: Google provides a very clear tutorial on their developer’s website. The ETA Transition Helper script we will use can be copied form there. But it seems a good idea to me go through this step by step so you can see for yourself you can save a huge amount of time.
Open your adwords account and your Google Drive
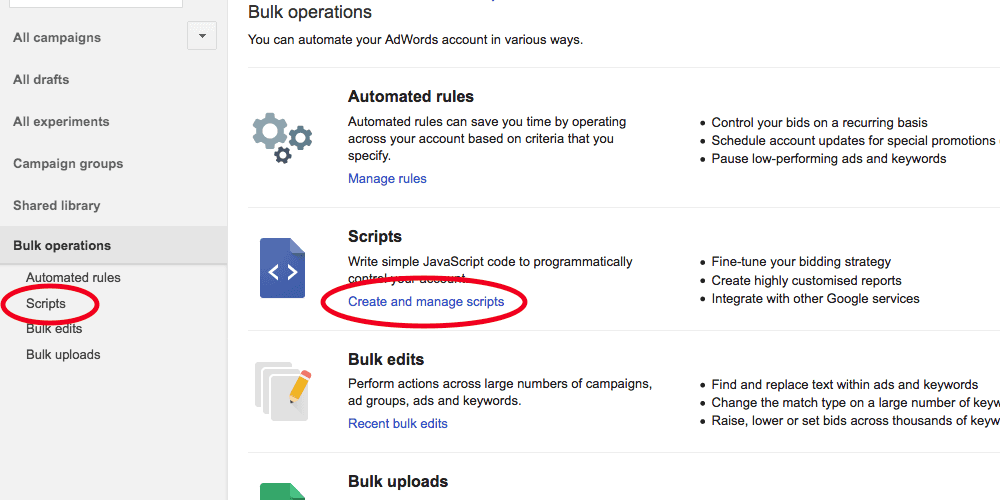
One of the most fascinating things about Google AdWords scripts is that it allows you to load information from external files located in your Google Drive. That’s exactly what will happen here too. The ETA Transition Helper script can run both on MCC level and account level. For this example, we will apply it to just one account. So log in to your AdWords account and go the the ‘Bulk Operations’ section. Then click on ‘Create and manage scripts’ under the Scripts header.
In the next screen, click the big red button to create a new script.

You arrive in a new screen where you will create the actual script. Give it a name first. It matters litte how you name it, but keep it logical. Next, erase the default lines in the editor an paste the ETA Transition Helper script entirely you copied form the AdWords scripts website.

Fill in your e-mailaddress on line 45. You will get a notification there when the script has run. Be sure to check your spamfolder. Now run the script (you can do this with the ‘preview’ button too). Note that you will have to authorise the script before it can run. Don’t worry, you only have to do this once. This is a permission you have to give because scripts can run even when you are not logged in into your AdWords account.
The script will now run and create a spreadsheet in your Google Drive. You can check the logs underneath the editor once completed:

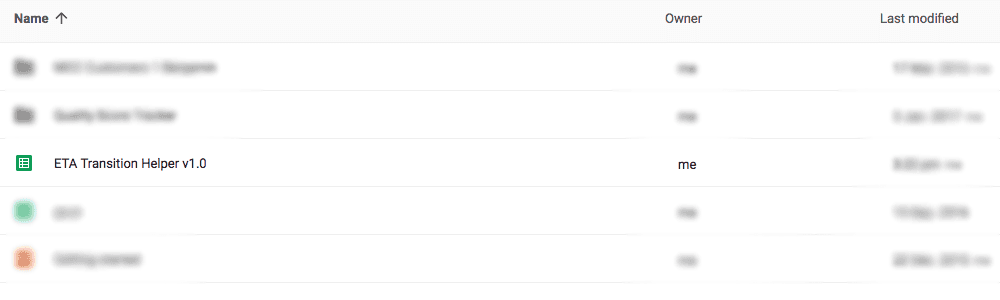
Now go to your Google Drive. You will notice it contains a new spreadsheet file:
Creating the Expanded Text Ads
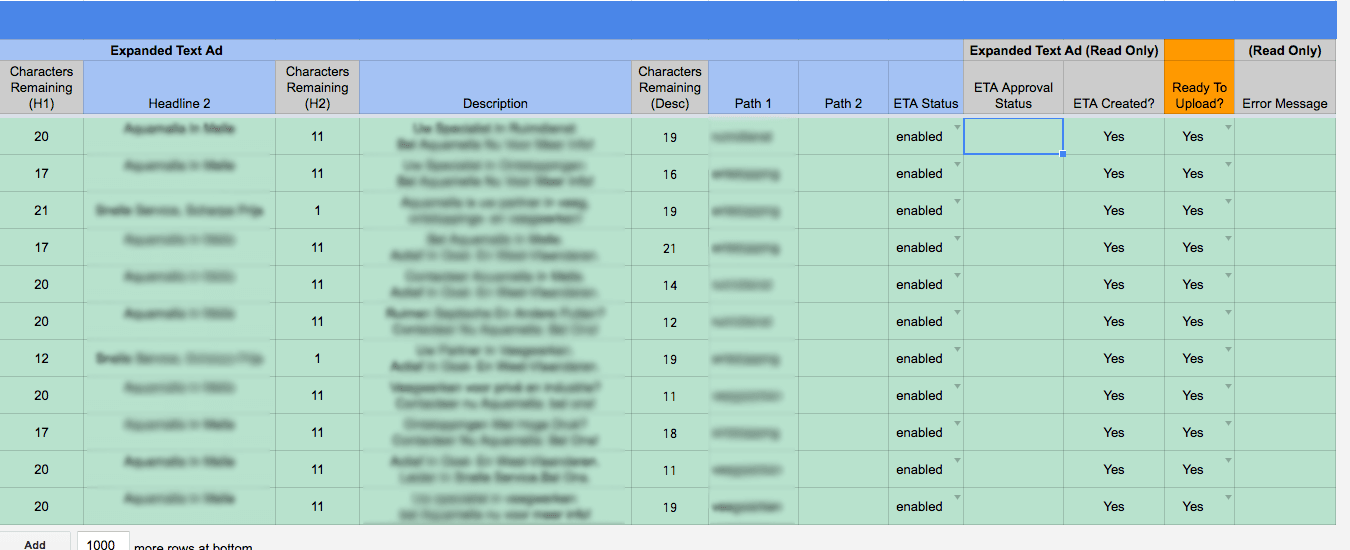
Open the file. You will see it contains all the information of your ads like campaigns, headlines, descriptions, final urls and so on. Scroll to the right and you will see a section dedicated to Expanded Text Ads where the information of the Standard Text Ads is filled in, except for ‘Headline 2’, ‘Path 1’ and ‘Path 2’. It is important to note here that the script only exports ads that are enabled in your account!
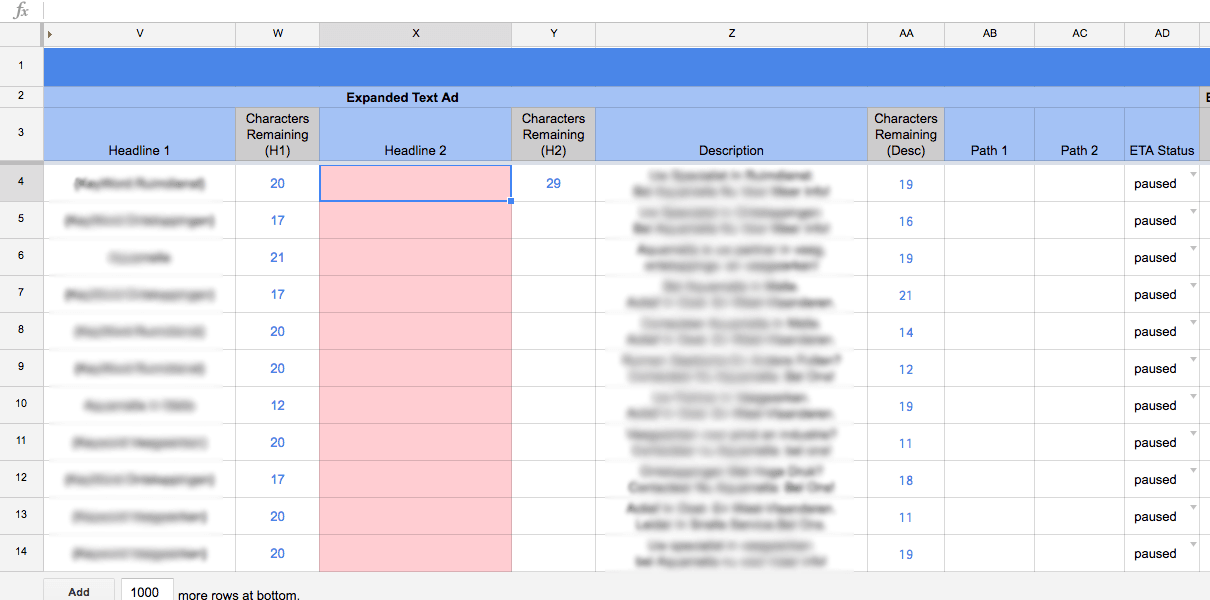
The absolute minimum you need for your Standard Text Ads to be changed into Expanded Text Ads is a ‘Headline 2’. The Path 1 and Path 2 fields are optional. Also note that not all columns are editable. Only the ones with blue headings can be edited. Now make the changes as you please. Once you are happy with your changes, set the ‘Ready To Upload?’ flag to ‘Yes’.
Before we are going to import the data from the sheet into our AdWords account, it is worth noticing that this procedure will not overwrite or change your existing text ads. It will create brand new Expanded Text Ads alongside your existing Standard Text Ads. Be sure to set the ‘ETA Status’ to enabled. It is up to you if you want your Standard Text Ads to keep running or not. If you don’t want them to run anymore, set the status in Standard Text Ad section of the spreadsheet to ‘paused’.
Now go back to your Google AdWords account and run the script again. It can take a few minutes before the run is completed. It depends of the number of ads in the spreadsheet. Once completed, go to any given campaign or ad group in your account. Don’t see any changes yet? Refresh (F5 on Windows or Cmd+r on Mac). The result should look something like this:
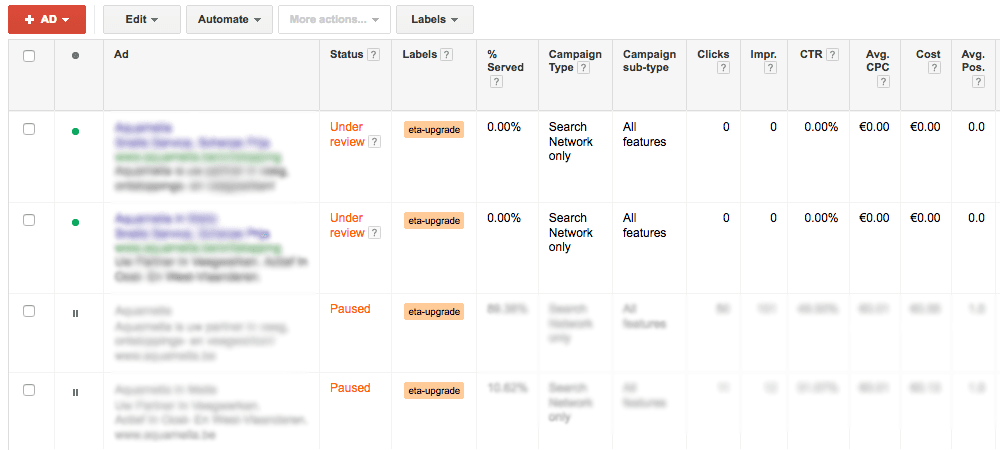
Notice the ads are labelled now. Also keep in mind the newly created Expanded Text Ads have to be reviewed before they can run.
Now go back once more to the spreadsheet in your Google Drive. You can see all the rows are now marked green and that the column ‘ETA Created?’ now marked ‘Yes’.